Hudson River AI
Resources / R+ AI
R+ AI user guide
Follow a radiology prior authorization from the first imaging order through the insurer’s decision. This guide covers the tasks for imaging staff and referring physicians.
Screenshots use fictional case data. Select any screenshot to see it at full size.
01 / Imaging staff
Open a case
- Sign in to your facility’s R+ AI portal and open Cases. Search by patient or chart number to find an existing case.
- For a new case, enter the patient and payer details and the scheduled scan date if known.
- Upload the imaging order and relevant records, such as visit notes, treatment history, or prior imaging reports. Mark the imaging order so R+ AI can use it when suggesting the referring physician.
02 / Imaging staff
Review source records
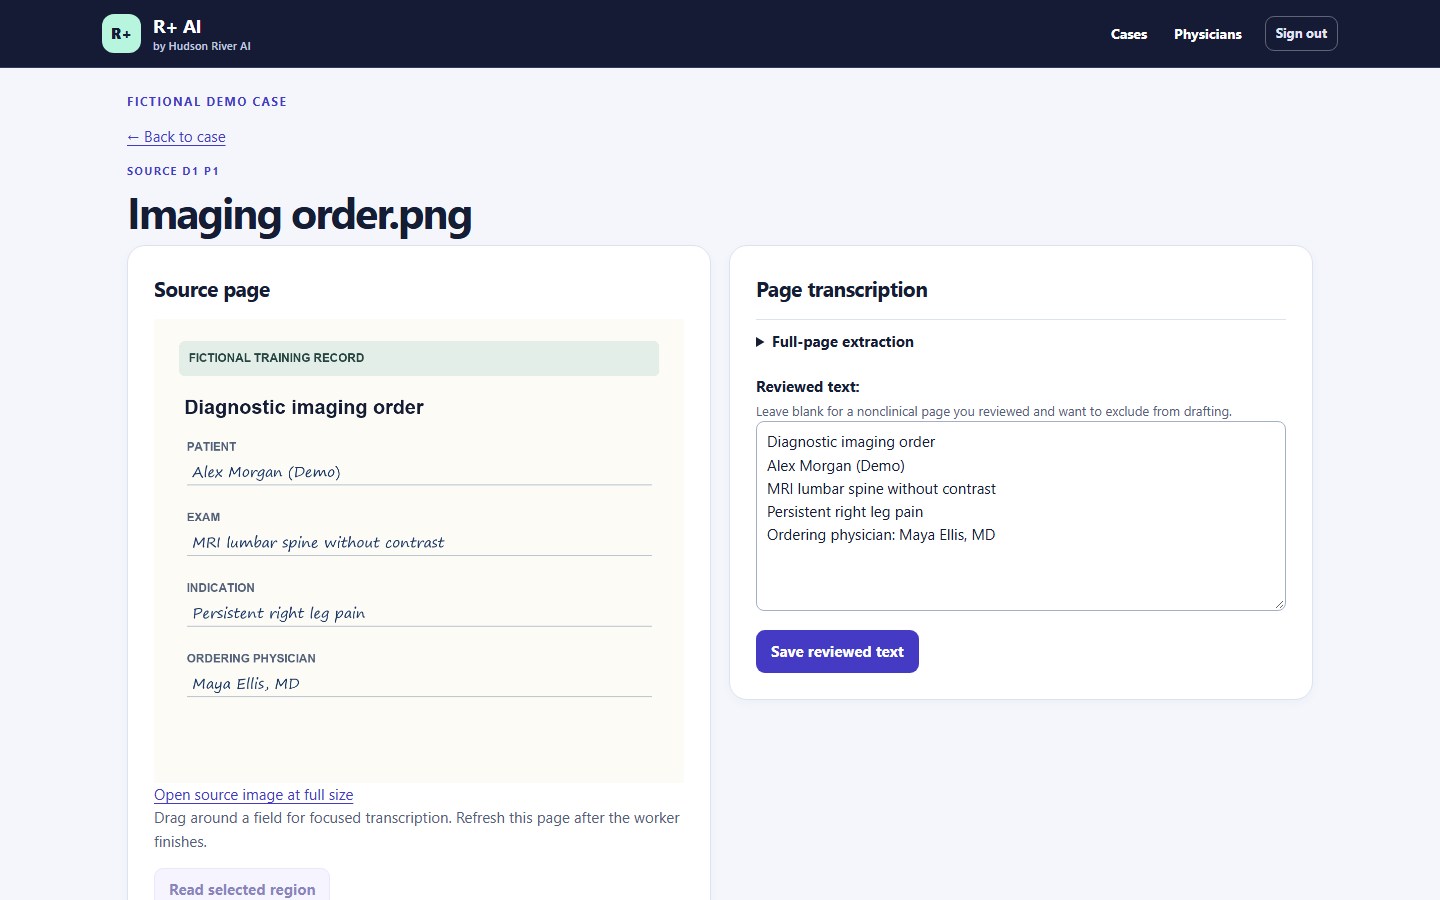
- Open each source page and compare the extracted text with the scan. Correct any missing or misread details and select Save reviewed text.
- If handwriting is hard to read, select the affected area for another extraction pass and verify the result against the image.
- Confirm the exam and referring physician against the order. Verify the physician’s account under Physicians before requesting review.
03 / Imaging staff
Draft the letter of medical necessity
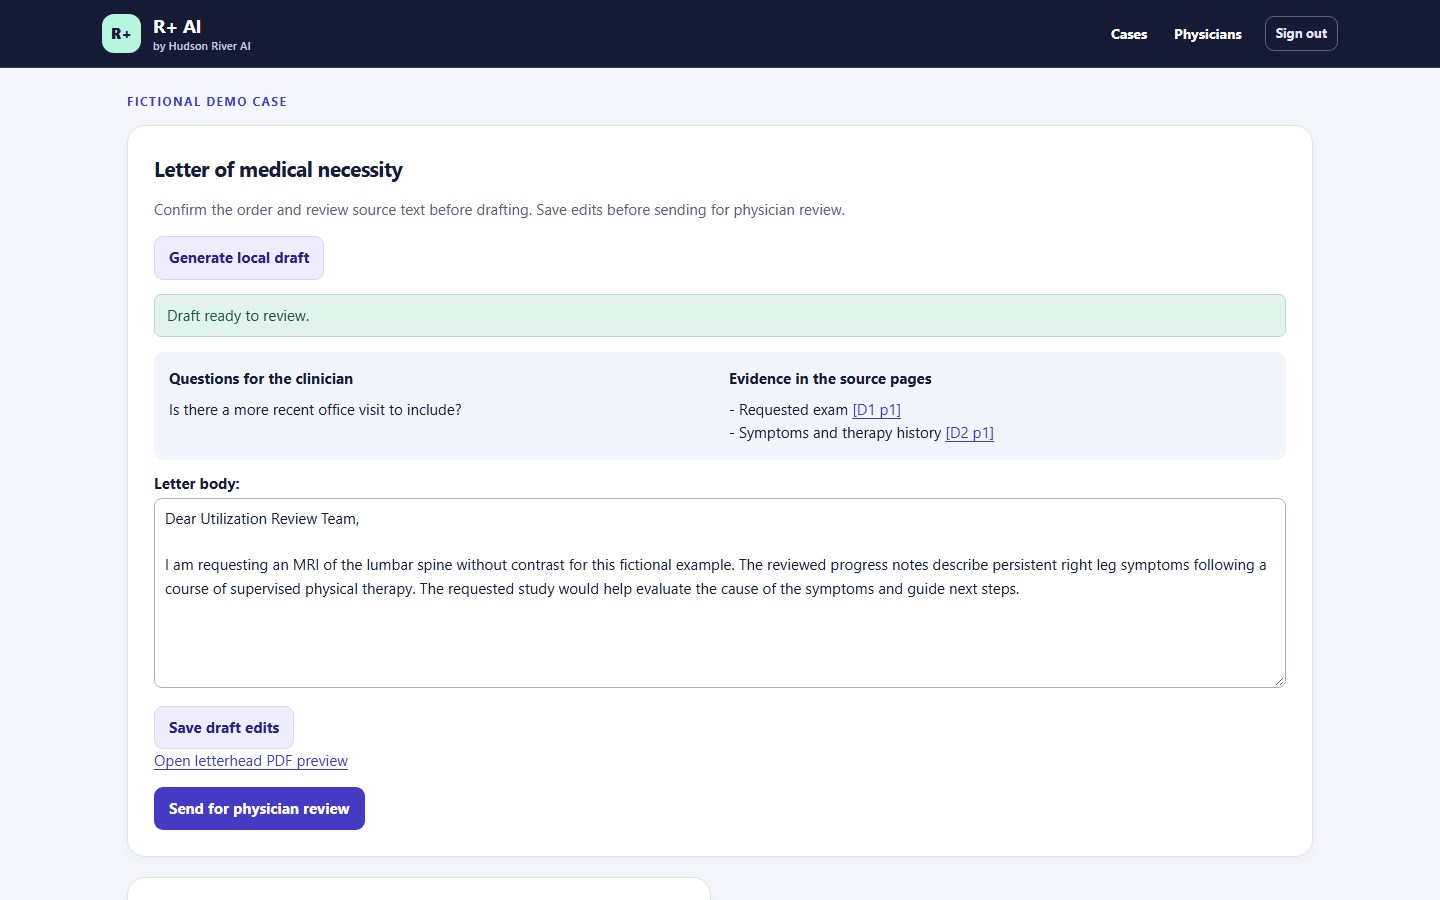
- After confirming the order and reviewing source text, select Generate local draft. The draft runs in the background. Refresh the case to check its status.
- Read the draft and follow the evidence links back to the records. Resolve open questions or add missing documentation before routing the case.
- Save any edits and request physician review from the case.
04 / Referring physician
Review and sign the letter
- Sign in and open the assigned case. To add your practice letterhead, upload it from Profile.
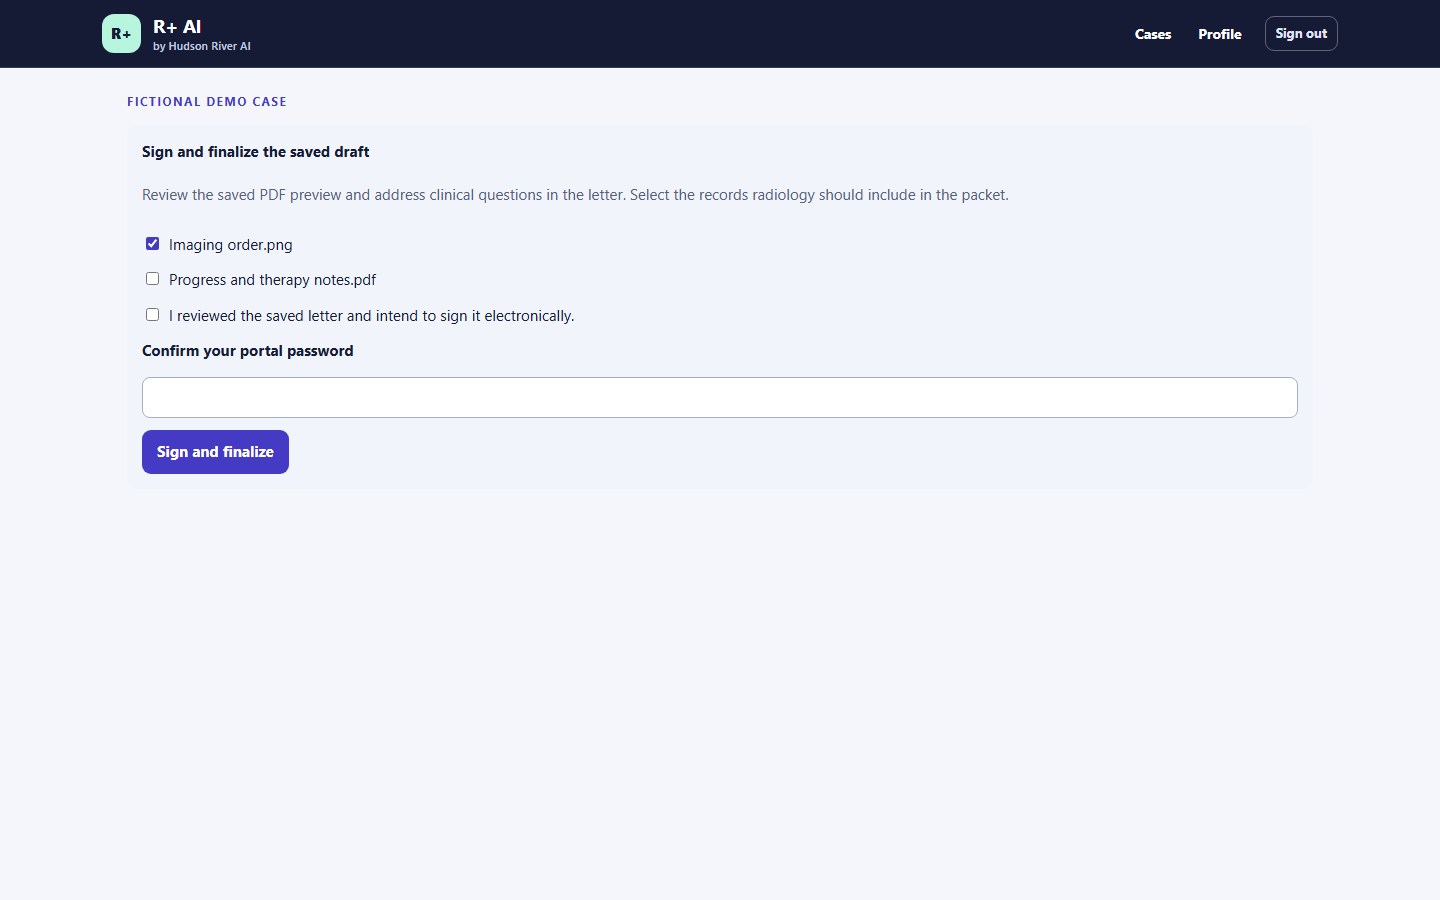
- Review the clinical rationale against the supporting records. Edit and save the letter, preview the PDF, and select which supporting records to include.
- Enter your portal password and select Sign and finalize.
05 / Imaging staff
Export and submit the packet
- In Signed versions, download the signed letter PDF or the ZIP packet with the selected supporting documents.
- Submit the materials through your facility’s existing payer portal or clearinghouse workflow.
- Record where and when you submitted the request in the R+ AI case.
06 / Imaging staff
Track the insurer’s decision
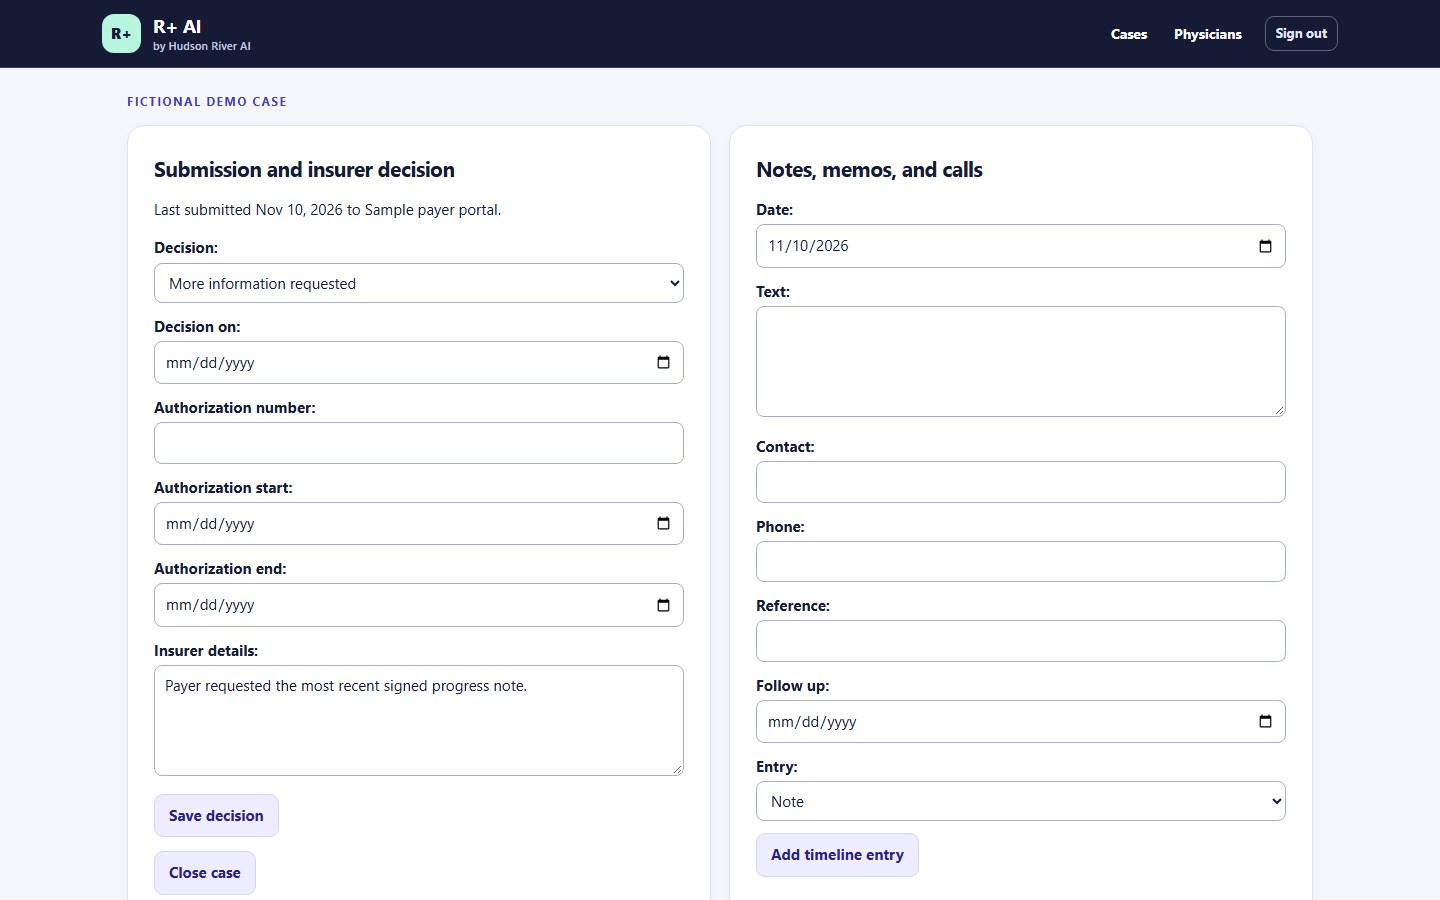
- Keep the case open while you wait for the insurer. Log requests for more information, calls, contact details, and follow-up dates in the case.
- When a decision arrives, record the outcome, decision date, and any authorization number and effective dates.
- Save relevant notes or reference numbers so the team can pick up the next action from the same case.